Warning!
This page provides information for the creation of a D.I.Y. (Do-It-Yourself) Multipurpose 12V DC Power Supply. Visitors are advised they use the information provided on this page at their own risk. The owners of this web site accept no liability and/or responsibility for the manner in which visitors employ the provided information, including but not limited to any injury, loss of data, damage to equipment and/or financial loss incurred as a result thereof.
This page provides information for the creation of a D.I.Y. (Do-It-Yourself) Multipurpose 12V DC Power Supply. Visitors are advised they use the information provided on this page at their own risk. The owners of this web site accept no liability and/or responsibility for the manner in which visitors employ the provided information, including but not limited to any injury, loss of data, damage to equipment and/or financial loss incurred as a result thereof.
Sourcing the Parts for a D.I.Y. Multi-purpose 12V DC Power Supply:
In a word ebay. If you are not in a screaming rush (i.e. you don't mind waiting for up to a month for parts to be shipped from China), and you want minimal financial outlay, then you can get just about everything you need for this project online.
Though I have both the technical and practical skill to design and/or build the required voltage regulators from scratch, it seems like an incredible waste of time to do so. The now readily available components are simple to implement, cheaper than I could buy the parts for and a huge time saving compared to circuit/PCB design, testing and then assembly. Also of course, they are relatively easy to replace and/or upgrade. I guess you could say that I'm well and truly over 're-inventing the wheel', just because I can.
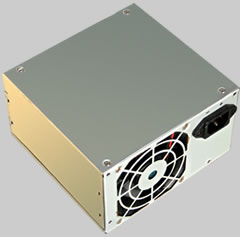
Old PSU case used to house components
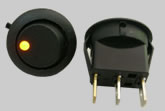
12V DC 16A Switches with LED
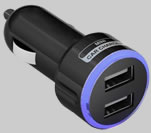
12V DC to 5V DC @ 1A
USB Charger / Regulator
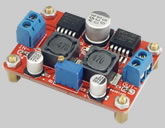
12V DC to 9V DC Regulator
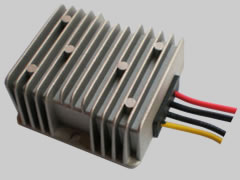
12V DC to 12V DC Regulator
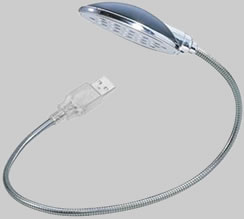
USB 13 LED Lamp
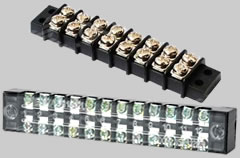
Terminal Strip Options
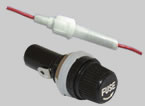
In Line (top) and Panel Mount Fuse Holder
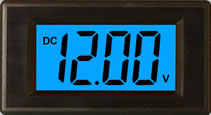
LCD Voltmeter
Approximate Parts Cost AUD $135
The total may be less depending on what you may already have as spare parts and where you source your parts from.
Required Parts:
- Case (with Optional Switch and Fan)
Though this item is first on the list, if you don't happen to have a case already ... wait until you have all the other parts then decide how large a case you'll need to house them all. Based on experience, a minimum case size will be in the realm of:
L 150mm x W 140mm x H 90mm.
I used the case from a fried PC power supply to house all the parts for the Multi-purpose 12V DC Power Supply project. It was a tight fit, but in the end, quite adequate. You don't want the case to take up more space than is absolutely necessary. Another advantage of using a old PC PSU case is that it comes with a fan housing, a power socket and in some cases even a power switch - ready to go.
- Rubber Feet For The Case and a Can of Spray Paint
Some rubber feet or stick-on rubber pads really are an essential to prevent damage to whatever surface the Multi-purpose 12V DC Power Supply unit will sit on.
The unit will look a little more professional if you paint it Black (or some colour that works for you). Paint the case after drilling and de-burring the required holes and before mounting / installing parts.
- Switches - 12V DC @ 16A
(3 Pin with dot LED indicator, ON/OFF, SPST)
These are always handy to have around when you've got a bunch of 12V gear running, so I just bought a 12 pack (three each of Red, Yellow, Green, Blue).
These will require a 20mm (3/4") hole with a slot for the locator pin that stops the switch from rotating when mounted.
- 12V DC to 5V DC Regulator
(1A to 2A will suffice)
You can get one of these almost anywhere. I used the components from a car Cigarette Lighter to USB Adaptor. With a little care in your selection, you should be able to select one that will allow you to use/mount the existing USB Ports in your Multi-purpose power supply project.
Practical uses include: USB powered LED Lighting, Charging USB devices, Additional Power for USB HDDs.
- 12V DC to 9V DC 1A Regulator
(Step Up Step Down Voltage Module)
This was a little more difficult to acquire, in that there was no specific device to do the job. So what I ended up using was a DC to DC converter. This unit essentially takes any DC input voltage (range 3.5V to 28V) and converts this to the output voltage you set with the provided trim pot (range 1.25V to 26V). The output current is specified at 1A maximum.
Note that this may be cutting it a little fine given that a single multi-effects unit can readily draw 350mA (over a third of the available current). If necessary use two of these units.
- 12V DC to 12V DC 6A Regulator
(DC 8-40V To DC 12V 6A Step-up & down Converter)
This 12V DC voltage regulator was easy to get because they are commonly use in most motor vehicles. This is a completely sealed, no-brainer, no setup item. Just wire it in (correctly) and it's ready to go.
- USB Ports
(2 or More USB Ports Recommended)
I used a Dual USB / Network Plug set from a dead PC mainboard. A bitch to extract/de-solder, but more than adequate for my needs (and I had several on hand). You may be able to use the USB Ports that come with the 12V DC to 5V DC adaptor mentioned earlier.
- 1 or 2 USB Powered LED Lamps
(USB powered Desk Lamp or Laptop Lamp)
After careful consideration I decided to go with 'off-the-shelf' products rather than a custom build. This way if anything fails it will be relatively simple to replace.
The criteria include: Flexible Stem (Goose-neck) and standard USB Plug.
- Internal Hook-up Wire
(Automotive / High Current)
You shouldn't actually need a lot of internal cabling. For example, the leads provided with the 12V DC to 12V DC 6A Regulator may be adequate for installing that device. Half a meter for each of the Red, Black and Yellow, 8A to 16A capable automotive wire should do.
- Terminal Strip to connect Power Output Wiring
(Any screw type terminal strip rated at 6A or better per connection)
A screw type terminal strip simplifies output wiring and allows you to add as many output connections as you need. Recommend using terminal strips with 8 to 12 available connections.
- Fuses and Fuse Holders
(Fuse holder type may be determined by your layout and available space)
There are several options for fuse holders. I went for the in-line fuse holders (like the ones that come with car audio gear), because I had some on hand.
Panel Mount fuse holders are more convenient to use, but these would have required drilling additional holes and would have taken up the space where the 9V regulator circuit is now attached to the case.
- External Power Leads and Plugs
(2 Conductor 8A Small Appliance or Lighting Cable)
The Terminal Strip allows the use of custom external power lead lengths made to suit your setup. Standard figure-8 (2 conductor) small appliance or lighting cable will be more than adequate in most cases (if it's not adequate, your device probably draws too much current to be suitable for this type of application).
It is important that the Plugs on the end of these leads are: 1. An exact match for the original plug provided with your equipment ... and 2. Are wired with the correct polarity (+/-). Getting the polarity wrong could damage or destroy your equipment! Using a terminal strip makes changing the polarity easy, but also makes it easier to get it wrong in the first place. Please be very careful and also clearly label your leads.
- LCD Voltage Meter (Optional)
The LCD (or similar) panel mount voltage meter is not essential, but it is really useful to occasionally monitor your 12V battery's charge level.
Taking a (non-deep cycle) car battery below 10,5V (particularly if on a regular basis) will ruin the battery quite quickly. Also, the greater the battery's depletion, the longer it will take to charge it up again.
NOTE: If you do not have the knowledge, skill and appropriate tools to complete this project ... then please find someone who does ... or buy something ready-made. There is NO support offered with regard to this project (See also the Disclaimer at the top of this page).
Next:
[ Part 3 - Multipurpose 12V DC Power Supply - Power Supply Assembly ... coming soon ]
Previous Pages:
Other Links:
[ An Experience with the CASIO WK-7500 ]
[ Capabilities of the CASIO WK-7500 Workstation Keyboard ]
Wizard - 130326
